
This circuit produces the firing sound of a machine gun, with less intensity of course, and without firing any kind of projectile. One suggestion is to use the circuit for sound effects for recordings, plays or demonstrations.
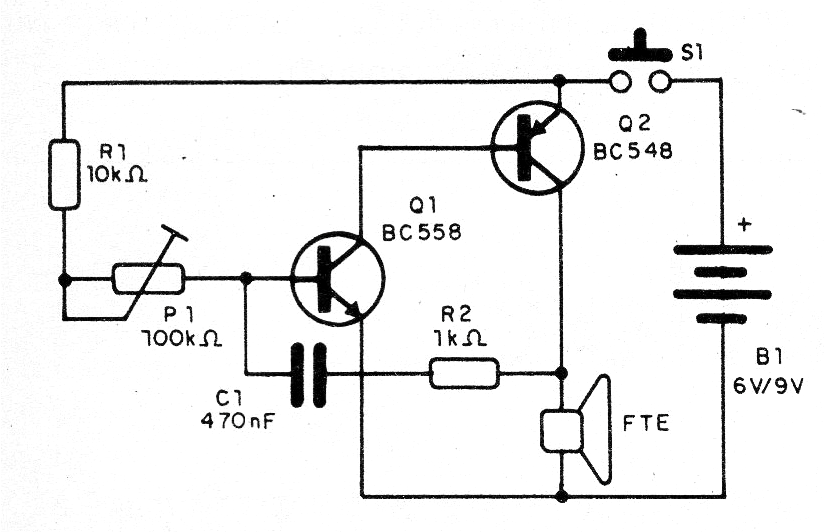
The circuit is powered by batteries and trimpot P1 is used to adjust the speed of the shots to achieve the greatest possible realism. For higher sound intensity it will be interesting to use a good performance speaker. In figure 1 we have the complete diagram of the device.
In figure 2 we give the arrangement of the components in a terminal strip.
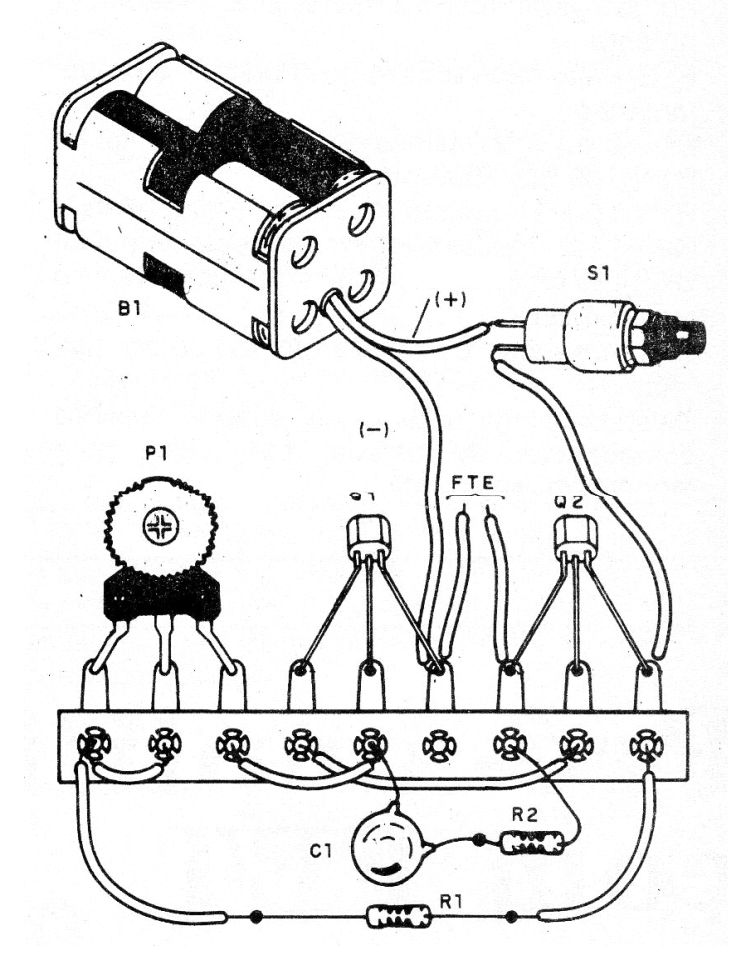
The transistors allow equivalents and for greater sound intensity can be used 9 V battery, but its durability will not be long, given the consumption of the device.
In figure 3 we have a suggestion of installation in a toy machine gun.
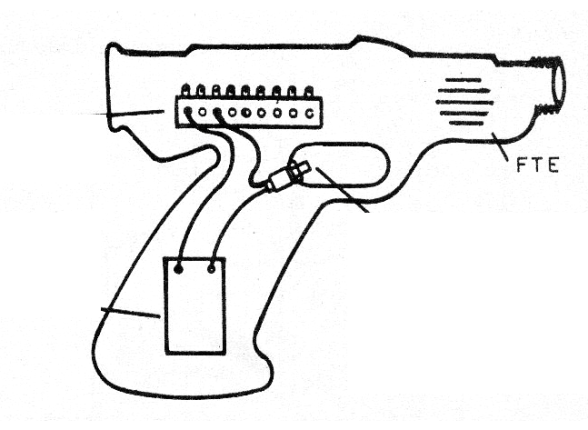
An interesting possibility is to use the circuit for higher intensity effects by connecting its output to the input of an amplifier. This can be done as shown in figure 4.
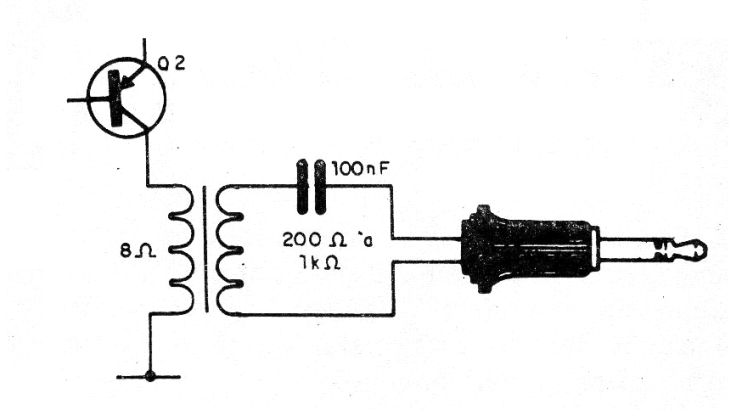
In this circuit the transformer is the type of output found in old transistor radios.
Material list
Q1 - BC548 - General Purpose NPN Transistor
Q2 - BC558 - General Purpose PNP Transistor
FTE- 4 or 8 ohm - speaker
B1 - 6 to 9 V - batteries or battery
P1 - 100k ohm - trimpot
R1 - 100k ohm x 1/8 W- resistor - brown, black, yellow
R2- 1K ohm x 1/8 W- resistor - brown, black, red
C1 - 470 nF - Ceramic or Polyester Capacitor
S1 - NO push button
Miscellaneous: terminal bridge, battery holder or battery connector, wires, solder, etc.


